Contact Us
1-800-348-2976
sales@mtiproducts.com
Ventless Revolution

Troubleshooting | Adjusting your AutoFry Basket Height

When people are shopping around for new kitchen equipment, one of the most common questions we receive is, “what is involved in maintenance?” And because I’m a practical person I like to relate it to something everyone is familiar with: Owning a ventless fryer like AutoFry is a lot like owning a car. With proper maintenance schedules, regular filter and oil changes and the occasional alignment, you can have a machine that will last you for decades to come.
Now, if you’re familiar with our fryer, you’re probably thinking, oil and filter changes make sense, but an alignment for my fryer?! Yep, you read that right! If your basket isn't dumping the food all the way or you see an AO4 error code displayed on the keypad display, you’re probably in need of a basket height adjustment, which in this case is really just an alignment! So today we walk you through the steps of a basket adjustment or alignment, as I like to call it, and provide you with an easy to follow step by step animated instructions!
How do you know if you need a basket adjustment?
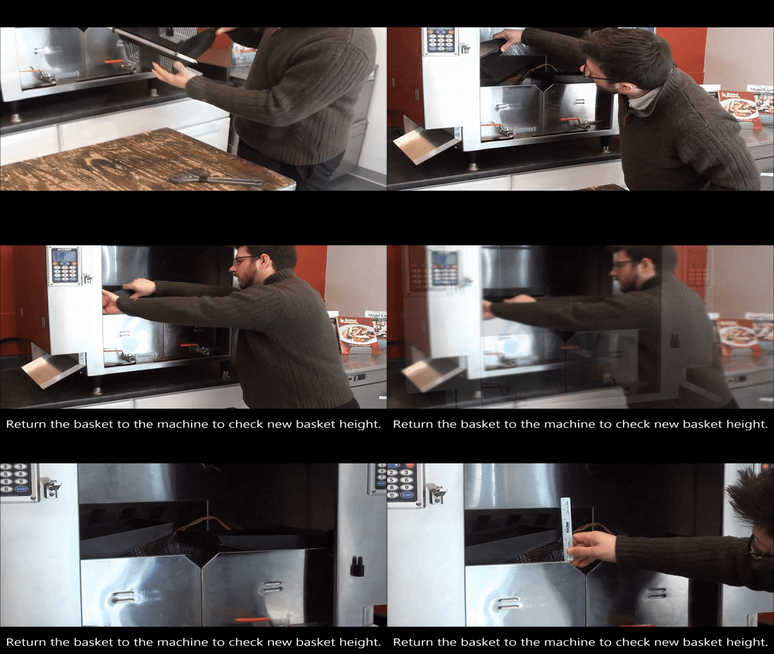
 The appropriate AutoFry basket height is 2.5-3 inches from the top of your oil pot to the top corner of the basket.
If your basket is sitting any higher or lower than that range you're likely going to run into issues.
In most cases, you’ll find food isn’t dumping all the way or your machine will actually present you with the AO4 error code on your keypad screen. In either event you’ll want to follow the following steps to correct it’s position.
The only tool you'll need to complete this asjustment is a crescent wrench.
How to adjust your basket:
|
Start with your AutoFry in the ready position, as noted on your keypad. |
|
STEP 1
Remove the misaligned basket from your AutoFry and place on a firm surface |
STEP 2
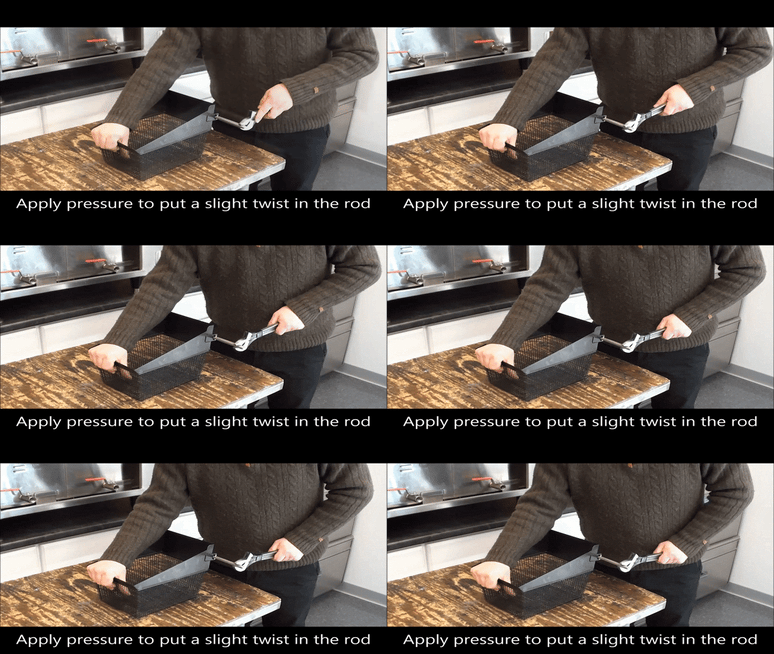
Hold the AutoFry basket firmly in place with one hand. |
STEP 3
With other hand, place the crescent wrench on the flat side of the basket rod. Apply pressure to the wrench to put a slight twist in the rod. A little twist will go a long way, so start small, test your work and twist more if you have to. |
STEP 4
Return the basket to your AutoFry to see if you have put the right amount of twist into the rod. Check if basket height is 2.5-3 inches from the top of oil pot to the top corner of the basket. If it is, congratulations you've successfully adjusted your AutoFry basket height! |
|
If your basket is not at the right height, repeat steps 2-6 until you've achieved the proper AutoFry basket height. This may require some trial and error. |
|
That's it. Four simple steps to adjusting your basket height and returning your AutoFry back into a frying master machine. Remember, if you have trouble, our technical support is open from 8am-8pm EST every day to provide assistance by calling 800-348-2976 x112


